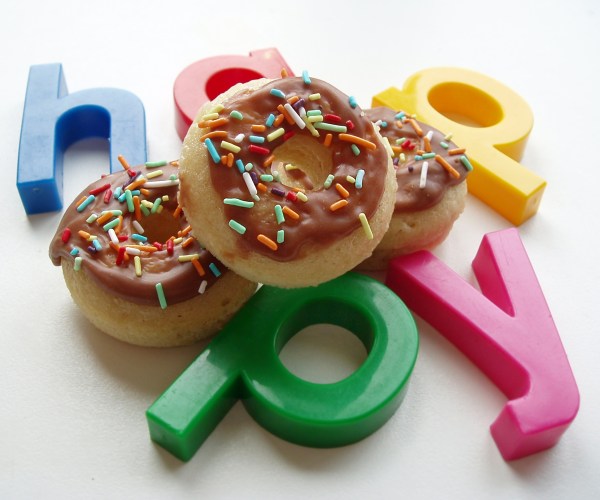
Supermarket shopping with the girls in tow always has the potential to become a very expensive affair. Take yesterday, for example. Despite numerous advance reminders of the enormous bag of sweets we collected last Thursday (I blame Santa), our procession towards the bakery department prompted clamours for the chocolate-covered doughnuts on display there.
I muttered that we could make some. The girls wanted to know when. Later. When we get home? I sort of mumbled a bit, which they took to be a firm agreement.
That’s why we were all in a chocolatey, doughnutty, sticky mess when O arrived home from work yesterday evening. The girls were very happy with their doughnuts. T was very happy spreading chocolate, largely around his mouth as far as I could see, but considered the doughnuts themselves far too suspicious to attempt to eat. I’m sure he’ll change his mind about this in another year or so.

The recipe for the doughnuts was written on the packaging of my mini baked doughnut tin. It offers a delicious and simple alternative to recipes that call for deep-fat frying of the doughnuts, but does rely on your having the pans for this. Even although you’d be hard pushed to regard doughnuts as a healthy option, it does make me feel slightly better about myself as a Mum when I see my children tucking into doughnuts that have been plucked from the oven rather than from the greasy depths of a pan filled with hot cooking fat!
And so, in celebration of all things seasonal, I’d like to wish everyone extremely happy doughnuts 🙂 .

Mini Baked Doughnuts (adapted from Judge Bakeware)
1 tbsp (1/2 oz) butter
225 g (8 oz) plain flour
1 tsp vanilla extract
175 g (6 oz) castor sugar
2 tsp baking powder
175 ml (6 fl oz) milk
2 large eggs, beaten
1/2 tsp salt
Preheat the oven to 160 degrees C (325 degrees F). Wipe the pan wells with a little cooking oil to prevent sticking.
Melt the butter in a small saucepan.
Combine the remaining ingredients in a large mixing bowl. Add the melted butter and stir thoroughly until the batter is smooth.
Pour the batter into the doughnut shapes, filling each no more than 3/4 full. Bake in the centre of the oven for 15 minutes (when tested with a skewer, the skewer should be clean). The doughnuts will come out easily if you carefully release the edges with the blade of a knife before attempting to pull them out of their wells.
Leave to cool, then decorate with chocolate sauce* and sprinkles.
* We make our current favourite chocolate sauce by melting 3 to 4 oz of chocolate together with a tablespoon of golden syrup, 1/2 oz of butter and 1 to 2 tablespoons of water.


Jeannette
/ January 1, 2009And a very happy new year to you too, Kate and family! I love your pictures of the doughnuts with the letters, very innovative! My daughter and her family have just left this afternoon after being with us for the holiday so I am now catching up on the laptop and relaxing, I need the rest!!!
Melinda
/ January 2, 2009Happy New Year to you too!
I love the wee little chocolate doughnuts! I bet the girls were tickled they could make them at home.
I’ve not seen this little doughnut making pan here. Such a good baking project to do with children!
amerrierworld
/ January 2, 2009I think my parents felt the same way when we left them in peace after staying with them for a couple of nights last week, Jeannette!
I found the doughnut pan a year or so ago in a local hardware shop, Melinda. I’m pleased I couldn’t resist it at the time as I haven’t seen any more of them since then. The girls have just eaten the last of the doughnuts we made (I’m surprised they lasted so long!).
Y
/ January 30, 2009What cute donuts! And a great way to present them 😀
amerrierworld
/ January 31, 2009Thanks, Y 🙂