Excellent Small Cakes

I am indebted to Jennifer Soucy (aka Lady Guenièvre de Monmarché) for wondering aloud about a recipe from the 17th century. The recipe is from a collection by Sir Kenelm Digby of his favourite pies, roasts, stews, jams, mead and cakes. Entitled The Closet of Sir Kenelm Digby Knight Opened, the culinary notebook was first printed in London in 1669. The fascinating part is that in Digby’s recipe for Excellent Small Cakes, he instructs the cook to “take three pound of very fine flower well dryed by the fire …”

It appears that Digby’s cakes are typically dense and tough when made today. Many modern redactions significantly alter the original proportions of ingredients in an attempt to lighten the texture of these cookie-like cakes. Having read about kate flour, Jennifer was reminded of Digby’s instruction to dry the flour well by the fire before using, and confessed that she had never followed this step in the procedure. Could this be the missing link?

I was intrigued. The implications are far-reaching … were the Elizabethans well-versed in the heat-treatment of flour? The food historian Alice Ross has described how baking in the 17th and 18th centuries often involved lengthy preparations:

“It must have required a few days just to get the ingredients ready – to pound the sugar into fine crystalline form, grind spices, stone raisins, cut imported candied citron fine, to cleanse the flour with several siftings, and to dry it at the hearth to remove excess moisture.”

It is easy to imagine that bakers were primed to pay specific attention to the level of moisture in the flour they were using. Did they discover that some recipes produced better results according to how well the flour had been dried? Looking through other recipes for cakes in Digby’s collection, it is noticeable that the only recipe requiring ‘flower well dryed by the fire’ is the recipe for ‘Excellent Small Cakes’. If he felt the need to include this instruction in a single recipe, he presumably considered it to be an important detail.

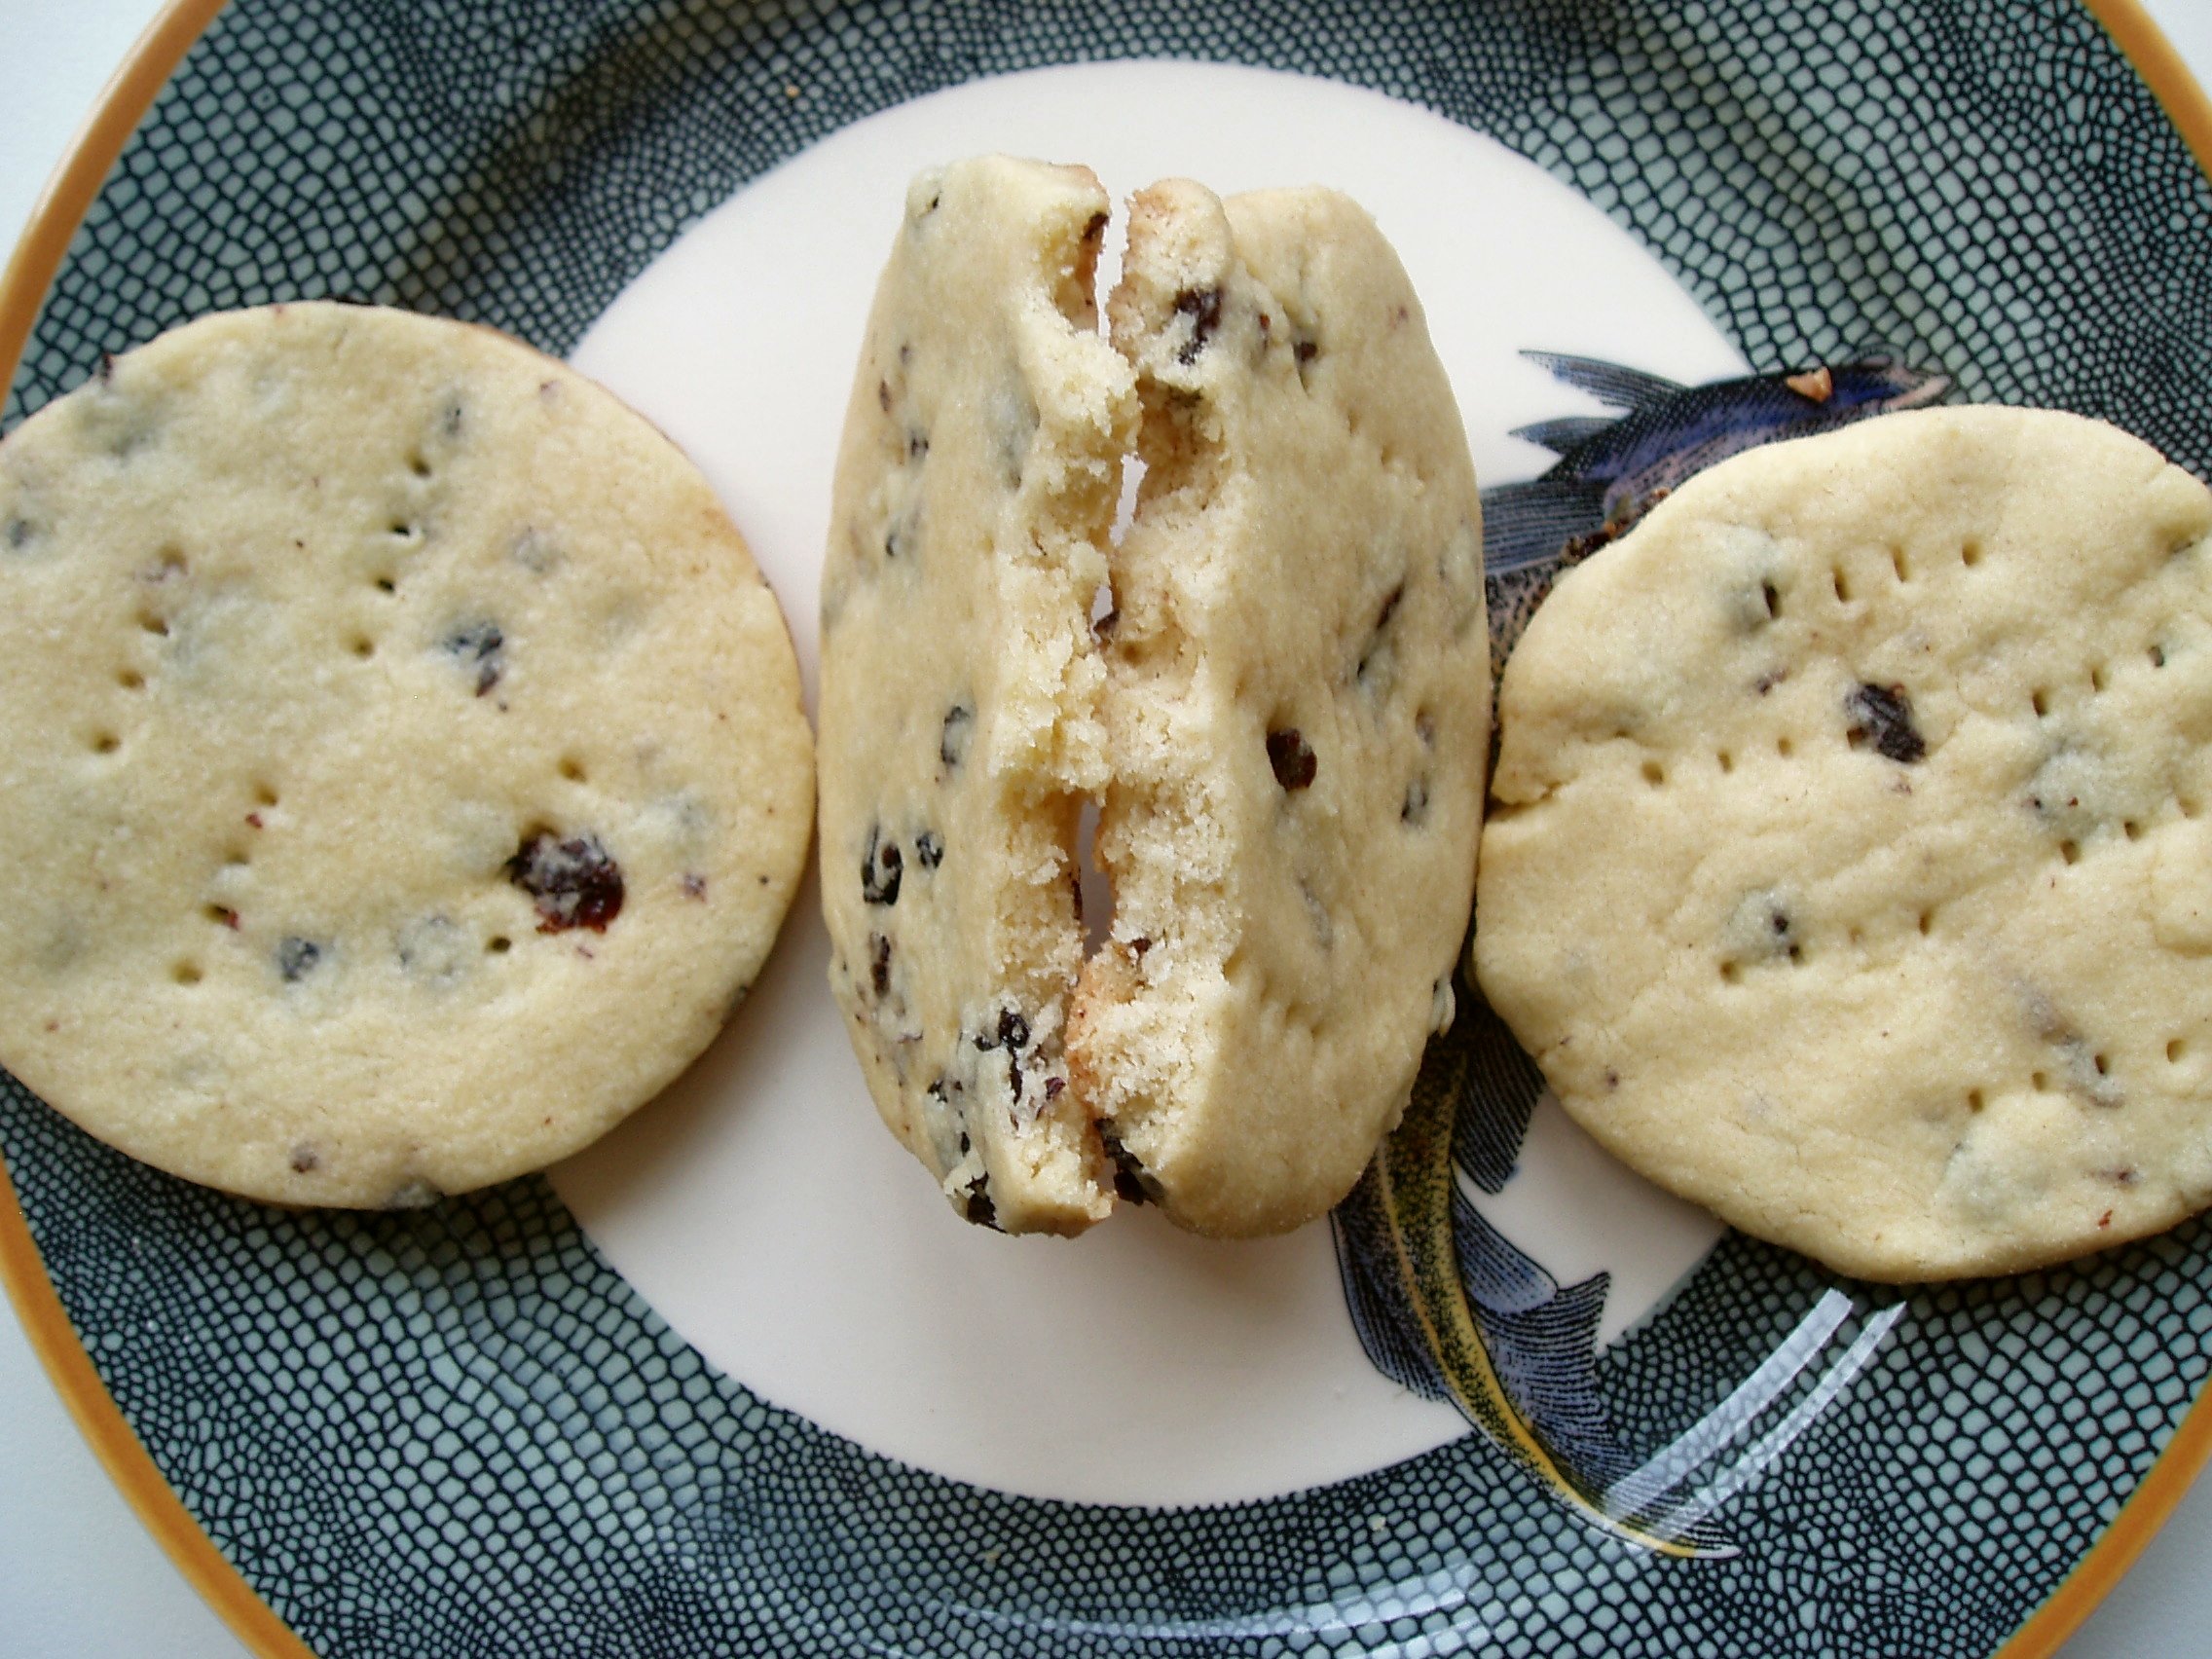
You can probably guess what happened next. Yup – I have just made two batches of Digby cakes, one using kate flour (far) and the other using untreated flour (near).

Excellent Small Cakes

The dough made with kate flour was less easy to work with than that made with untreated flour. I flattened it with my hands and then rolled it to about 1/4 inch thickness. I used a round cookie cutter to cut circles and picked them up by squeezing the edges slightly as I lifted them. The untreated-flour dough was moister. It rolled out better and the circles were less fragile. I was able to transfer these more easily than the kate-flour circles to a lightly greased baking sheet.

Although the untreated-flour dough certainly scored more points in terms of handling, the kate-flour ‘cakes’ (pictured on the right) won hands down when it came to taste and texture. They rose slightly higher than the untreated-flour cakes, had an open cake-like crumb and were meltingly delicious to eat. The untreated-flour cakes (pictured on the left) were dense, tough and chewy – hardly what I’d describe as either ‘excellent’ or ‘small cakes’.

Side by Side Comparison

Excellent Small Cakes
My scaled redaction of an original recipe by Sir Kenelm Digby

450g / 16 oz cake (or kate) flour
225g / 8 oz caster sugar
113g / 4 oz dried currants
225g / 8 oz butter, softened
3 tbsp + 1 tsp double cream
1 egg yolk
2 tsp grated nutmeg
3 tbsp dry white wine

Preheat the oven to 190 degrees C. Lightly grease a large baking sheet.

Combine the flour, sugar and currants in a large bowl and whisk to mix thoroughly.

Cut the butter into small pieces and add to the flour mixture. Beat to combine.

In a separate bowl, lightly combine the cream, egg yolk, nutmeg and wine. Stir into the flour/butter mixture to make a dough.

Flatten the dough with your hands on a clean surface. Roll to a 1/4 inch thickness. Cut into circles with a round cookie cutter and place on the baking sheet. Prick several times with a fork.

Bake in the centre of the oven for 8 to 10 minutes. Leave to cool slightly on the baking sheet before transferring to a wire rack.

When cool, the cakes may be iced with sugar. I didn’t ice my cakes, but I did find some references on sugar icing that provide recipe ideas from contemporary sources.

Gingerbread Wonderland

The girls and I spent a very enjoyable afternoon yesterday rolling out our gingerbread dough and using our Christmas cookie cutters to make a winter wonderland scene. L took her job very seriously and decorated her cookies with precision:

Decorations by L

M tried hard to copy her older sister, but she was just soooo tempted to eat those shiny candy balls …

Decorations by M

We have entered our finished tableau into Baking Bites’ Gingerbread Cookie Contest (although it was a very transient work of art – the pieces had mostly been devoured by this morning!).

Gingerbread Wonderland

This particular gingerbread recipe has been a big hit with the girls. Not too sweet, not too tooth-shatteringly hard … eminently munchable. It stated out in life as a recipe by Harpavan Singh Kapoor in The Telegraph, India. I didn’t want to make such industrial quantities, so I halved the recipe. I also substituted Golden Syrup for honey and added some ground ginger. When it came to the point where the dough is supposed to stick together, it didn’t … stick, that is. I had a nice bowl of spicy breadcrumbs, but the smooth, stiff dough I was supposed to be forming was nowhere in sight. So I added an extra egg and bingo!

Gingerbread

12 oz/1 cup Golden Syrup
3 1/2 oz castor sugar
2 tablespoons groundnut oil
2 tablespoons water
1 lb 10 1/2 oz plain flour
5 1/4 oz ground almonds
4 teaspoons ground ginger
2 teaspoons cocoa powder
2 teaspoons ground cinnamon
6 teaspoons baking powder
1 egg + 2 egg yolks
1/8 teaspoon lemon extract

Heat the Golden Syrup, sugar, oil and water in a saucepan until the sugar has dissolved. Set aside to cool to room temperature.

In a very large bowl, mix together the flour, ground almonds, ginger, cocoa, cinnamon and baking powder. Stir in the egg, yolks and lemon extract.

Add the syrup and stir well to make a smooth, stiff dough. Wrap in cling-film and refrigerate for at least 2 hours.

Pregeat the oven to 180 degrees C. Lightly butter a large baking tray. Roll out the dough to 1/2 cm thickness and cut into shapes. Bake for 8 to 10 minutes until golden (small shapes bake very quickly, so keep an eye on them). Transfer to a wire rack to cool, then decorate as desired.

Cookies Galore

A picture speaks a thousand words.

Comparing cookies

It’s not a particularly good picture – the light was fading, my camera flash is (still) broken and I didn’t really arrange the cookies very aesthetically. However, it says all I want to say and more …

… the flat, crispy cookies on the right were made with untreated plain flour; the crunchy, chewy cookies on the left were made with the same flour, microwaved (à la kate).

Chocolate Chip Cookies

A few days ago, I read about how Joy of KnitsyBitsy had successfully used kate flour to make Peanut-Butter Chocolate-Kiss Cookies. Well, I never knew that cookies in the US were any different from cookies in the UK! What had I been missing out on all these years?

A quick bit of background reading brought up this information from Cooks Illustrated:

We tried unbleached and bleached flour to see which would yield the most tender cookie … After numerous tests, varying the type of flour, the proportion of flour to butter, and sifting and not sifting, we decided that the best cookie resulted from unsifted, bleached, all-purpose flour … Bleached flour, with less protein than unbleached flour, helps make the cookie crispy and crunchy on the outside and tender inside.”

Thick, crunchy and chewy chocolate chip cookies. Mmmm. And bleached flour was responsible for this?

Needless to say, I had to try it out with kate flour to see if it too would give these results. I don’t (yet 😉 ) own Rose Levy Beranbaum‘s book of cookie recipes, so I decided just to go with the recipe from Cook’s Illustrated that I found here (although as a side note, I have to say that I found these cookies too sugary for my taste).

I blasted 10 0z of plain flour in the microwave for a total of 6 minutes (stirring after each minute) until it reached 130 degrees C. I sieved the flour to remove any lumps and left it to cool to room temperature. I then used this flour in place of the bleached all-purpose flour called for in the recipe.

True to their word, these cookies were indeed crunchy on the outside and chewy inside. My daughters loved them! Guess what they had for breakfast this morning?

Thank you for setting me on to this with your Peanut-Butter Chocolate-Kiss cookies, Joy 🙂 .

Cookies

Gingersnaps

On Fridays, I take my younger daughter (M) and baby son (T) to a local toddler group. It is a very popular toddler group that attracts children from many neighbouring villages. It is well organised, has interesting and well-looked after toys and takes place in warm, carpeted church rooms. However, I suspect that its popularity is largely determined by the wonderful selection of home-baked treats that appear for the adults during the children’s snack-time. Cakes, muffins, flapjack, shortbread … all made for us each week by two or three of the Mums who run the group.

Last Friday, platefuls of gingersnaps were passed around. I’d forgotten how much M loves these biscuits. She not only ate mine but managed to sneak at least two more from the plate.

In the afternoon, it was cold and drizzling. What better to do than bake our own gingersnaps?

Gingersnaps

Gingersnaps

12 oz self-raising flour
7 oz golden castor sugar
pinch salt
1 tablespoon ground ginger
1 teaspoon bicarbonate of soda
4 oz butter
1/3 cup Golden syrup
1 egg, beaten

Pre-heat the oven to 170 degrees C.

Sift together the flour, sugar, salt, ginger and bicarbonate of soda.

Melt the butter and Golden syrup together in a pan over low heat until runny. Leave to cool slightly, then add to the dry mixture.

Add the egg and stir well to combine.

Form the dough into walnut-sized round balls and place at wide intervals on an ungreased baking tray.

Bake in pre-heated oven for 10 to 15 minutes for chewy centres, or 15 to 20 minutes for crunchier centres. Let cool slightly on tray before transferring to a wire rack.

  • Enter your email address to subscribe to this blog and receive notifications of new posts by email.

    Join 289 other subscribers
  • Seasonal Recipes

    candied peel

    baileys chocolate truffles

    gingerbread men

    mince pies

    fudge

    smarties cookies

  • Freshly Made

  • Categories

  • Favourite Feasts

  • Awards

    DMBLGIT Award
  • Archives

  • wordpress visitor counter
  • Adventures in food by Kate Coldrick from Woodbury in Devon.